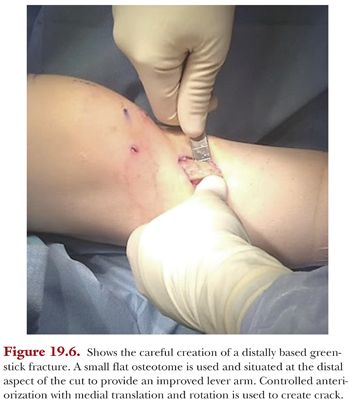
Next, we turn our attention to the inferior portion of the patellar tendon where it inserts into the superior portion of the tuberosity. Small capsulotomies are made on either side of the patellar tendon (Fig. 19.2). The medial and lateral borders of the tendon must be free with scissor dissection, as eventually, this will need to be mobile for the transfer. Scissor dissection is then used to undermine the tendon, and a hemostat clamp is bluntly taken from lateral to medial to ensure complete mobility of the distal insertion of the tendon. Gently flexing the knee off the side of the table places the extensor mechanism on slight tension and greatly facilitates working around the borders of the distal patellar tendon attachment. Another pearl is to use a right-angle retractor under the tendon to allow for ventral retraction of the tendon during the undersurface dissection.
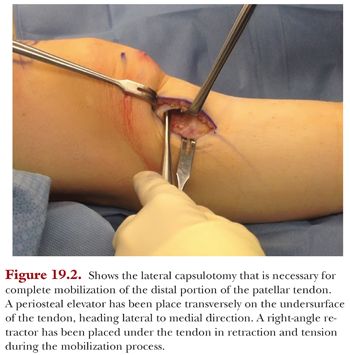
The length and width of the shingle are then marked out, and its borders are dissected with electrocautery. It is very important to maintain full-thickness periosteal tissue on the pedicle of the tuberosity and to not disrupt this important supply of vascular tissue that will ultimately facilitate osteotomy healing. Laterally, the anterior compartment must be atraumatically elevated off the tibia and safely retracted to protect the neurovascular structures. The shingle must be slightly wider than the patellar tendon and should be at least 5 cm in length (Fig. 19.3). Alternatively, if a distalization must also take place, the shingle can be made 6 cm in length, thus allowing for removal of the desired amount of distal bone to permit normalization of the CD index. On the proximal lateral border of the tibia, an oblique dissection in the superoanterior direction is carried out. This oblique connection is what allows for the connection cut between the tibial plateau and the tuberosity.
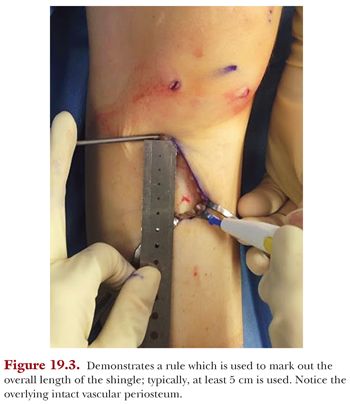
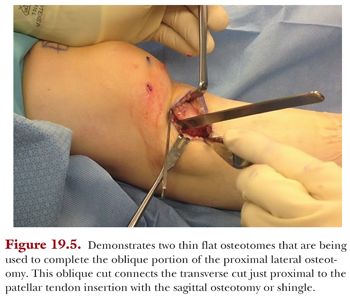
After careful exposure, two single-trocar 0.045-mm Kirschner wires (K-wires) are placed and serve as a template for the freehand cut. The K-wires are placed from the medial to lateral direction and should be angled in the anterior to posterior plane at either 30, 45, or 60 degrees, depending on the desired amount of anteriorization (if an anteriorization is being undertaken as an unloading portion of the osteotomy) (Fig. 19.4). If only coronal plane malalignment is being corrected with no anteriorization necessary, then the K-wires would be placed parallel to the floor to achieve a straight medialization. One K-wire is placed proximally and one is placed distally to help guide the osteotomy. A sagittal saw blade, 40 mm in size, is then used to cut the tibia. The cut is medially based and must progress in the anterior distal direction if AMZ is being performed. Broad periosteal elevators are placed on the posterior lateral border of the tibia and used for retraction of the anterior compartment and periosteum. Important pearls are to first score the bone medially to mark out the extent of the cut, to work in the proximal to distal direction, and to stay at the level of the previously placed K-wires and use their angle as saw guides. Next, we connect the dots to achieve a full-thickness cut with a straight 10-mm osteotome. A small 6-mm osteotome is used to make the transverse cut under the patellar tendon just proximal to its attachment on the anterior tibia (Fig. 19.5). A right-angle retractor is used during this portion of the case to elevate the tendon and avoid injury. At this point, we turn our attention to the oblique connection laterally, which is freed and completed with the use of a broad flat osteotome. The shingle should then be free to toggle, with its only remaining attachment site being distally based. If the shingle does not toggle, then any remaining medial, lateral, or proximal connections can be freed with an osteotome.
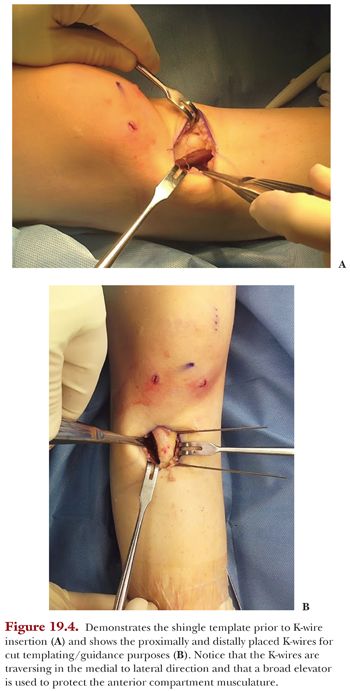
To free the distal portion of the tuberosity pedicle, a controlled greenstick fracture must be created. We accomplish this fracture with the use of a flat osteotome placed within the cut and then use controlled rotatory movements to crack the distal bone (while maintaining an intact periosteum). The osteotome must be placed as distal as possible within the cut to prevent fracture of the shingle more proximally than desired (Fig. 19.6). If we need to distalize the tuberosity, it is important that we preserve as much cancellous bone as possible and work the osteotome in the distal direction (with minimal rotatory movements). After the greenstick fracture is created, the tuberosity should be free to move en bloc with the extensor mechanism. The amount or degree of medialization should match the preoperative plan that appropriately corrects the TT-TG. We prefer to measure the amount of transfer with the width of an osteotome blade. The osteotome can then be left in situ to act as a shoe horn, during tuberosity fixation, so that no amount of correction is lost.
