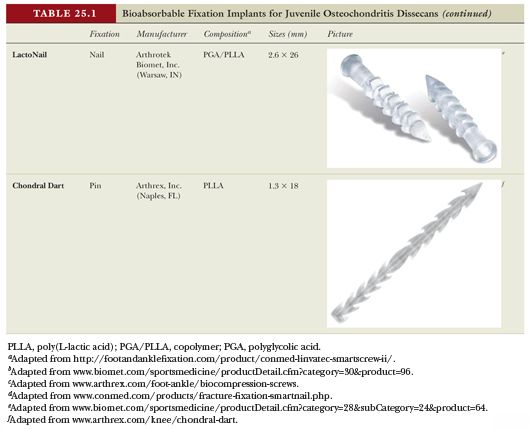
Diagnostic arthroscopy is performed to verify the size and quality of the lesion while simultaneously removing small loose bodies and debris within the joint. For hinged or partially detached lesions, a probe can be used to elevate the fragment, exposing the fragment–bed interface for assessment. An arthroscopic shaver is used to clean and débride any soft tissue on each surface until bone is encountered. For completely detached osteochondral lesions, attention is first directed toward débridement of the subchondral bed in which the lesion sits. Fibrous tissue within the bed is removed, and multiple drill holes are introduced into the sclerotic bed of bone using microfracture awls, K-wires, or drills to allow improved access to the subchondral blood supply for repair. Next, the fragment is débrided and fibrous tissue is removed. Frayed or incompetent edges and flaps are removed from the fragment and bed. It is important to inspect the fit of the fragment, given the size of the bed. If the bed is depressed, consider local bone autografting from the lateral trochlear edge or other bone graft sites such as the iliac crest. For the majority of completely detached cases, this procedure can be performed through a small arthrotomy. However, for most partially detached fragments, arthroscopic techniques can be used. For best visualization, we use both a 30- and 70-degree arthroscope.
The implant-introducing device is advanced into the joint and positioned onto the surface of the osteochondral fragment. When contact has been made, 1.5-mm K-wires are advanced through accessory portals into the joint and through the lesion to provide additional fixation of the fragment and ensure alignment of the implant-introducing tip. Next, a hole is drilled through the osteochondral lesion using a 1.5-mm drill. The SmartNail drill is advanced to the preferred depth when the desired depth marks on the drill align with the side holes near the handle.
A bioabsorbable SmartNail bone fixation implant is inserted into the rear of the handle. A piston is advanced into the rear of the handle until it reaches the silicon cover of the fixation implant. The piston is then tapped with a hammer until the piston reaches its preferred position. We typically use three to four 1.5-mm SmartNails for a 1 cm loose body.
The authors of this chapter prefer to treat each patient whom we feel is an appropriate candidate for surgical management of a JOCD lesion with biodegradable fixation implants. However, we prefer to always have metal interference screws accessible in the operating room during each JOCD case in the event that additional fixation of the osteochondral defect is desired.
POSTOPERATIVE MANAGEMENT OF JUVENILE OSTEOCHONDRITIS DISSECANS LESIONS
Patients are recommended non–weight bearing on crutches for at least 6 weeks while performing non–weight-bearing knee range-of-motion exercises to prevent postoperative stiffness. After 6 weeks, we typically recommend weight bearing as tolerated without running and jumping for an additional 6 weeks. Return to sports can commence after clinical and radiographic evidence of healing. Healing of the treated lesion is determined by evaluating the patient’s plain radiographs and MRI at follow-up. Resolution of the radiolucent area on anteroposterior (AP) and lateral views of plain radiographs, as well as disappearance of the high-intensity signal around the lesion on MRI, indicate initiation of healing. Repeat arthroscopy is indicated if the patient is symptomatic or if any area of the lesion is incompletely healed on postoperative radiographs.
Case 1
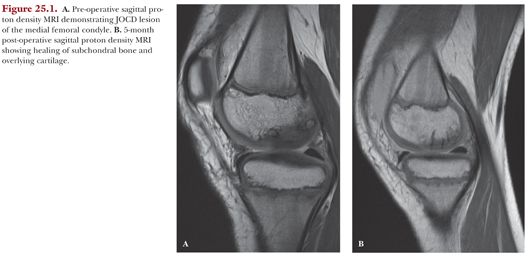
An 11-year-old male presented with a painful JOCD lesion of his right medial femoral condyle (Fig. 25.1A). Arthroscopic assessment found the lesion to be unstable. Arthroscopic treatment included debridement of intervening fibrous tissue and fixation with multiple bioabsorbable SmartNails. At 5-months follow-up, MRI evaluation displayed significant signs of healing (Fig. 25.1B).


